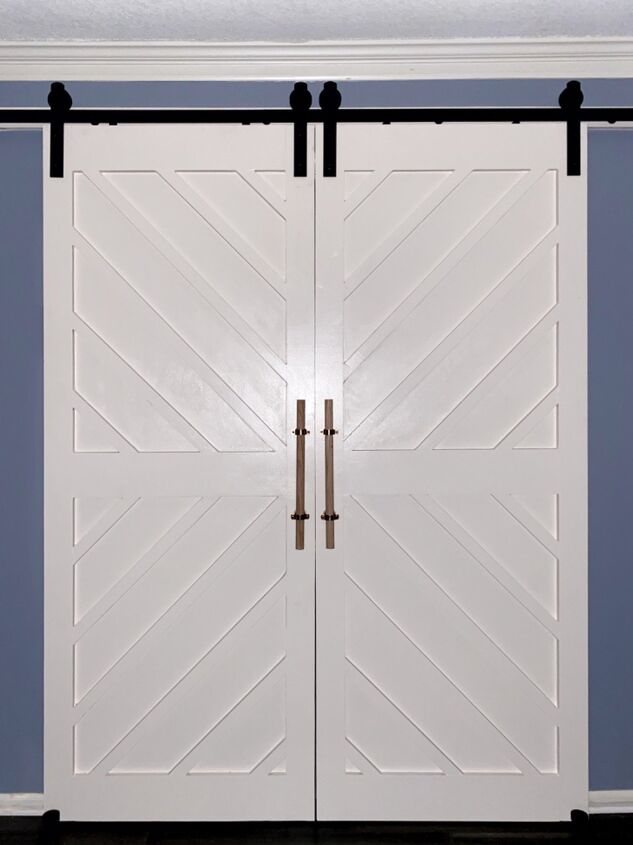
When we moved in we had some damaged bi-fold doors that separated our master bedroom from our master bathroom. We never closed them as they didn’t work well and with them opening into our bathroom it took away valuable real estate from an already cramped bathroom. I decided that a traditional barn door was not our style but = a more modern double barn door would be more out style. These doors were my first big build and I am so proud of them! Here is how I built these doors.

Materials:
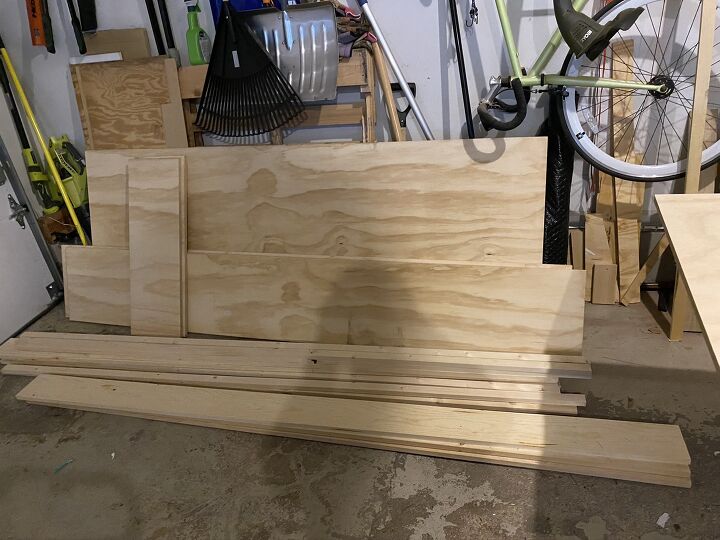
2 sheets 3/4″ sanded plywood
Ten to twelve 1×2 boards
Two 1×4 boards
Three 1×6 boards
Wood glue
Miter saw
Brad nailer
Brad nails
Sand paper 120 grit
Primer
Paint
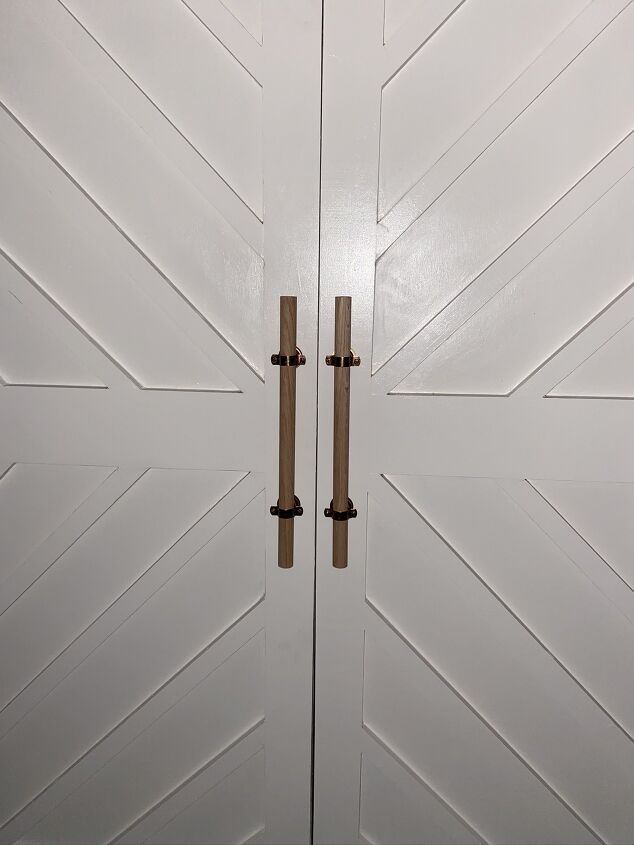
1″ round dowel
Couplings
Now let’s build these barn doors together:
Start by measuring your door frame. Our door opening was 60″ wide by 79 3/4″ high. I decided to overhang the doors so they covered the door trim. 1/2″ on the width of the doors and 1/4″ on the length.
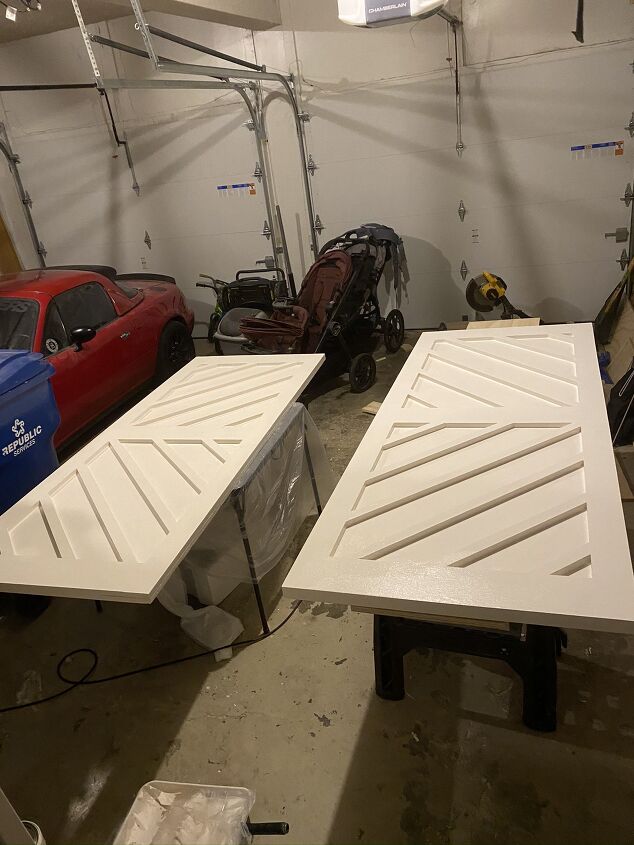
Cut your 3/4″ plywood to size. I had home depot cut mine for me which made it way easier! Our doors are 85″ in length and 29.74″ wide. I used 2 pieces of 4×8 plywood for this.
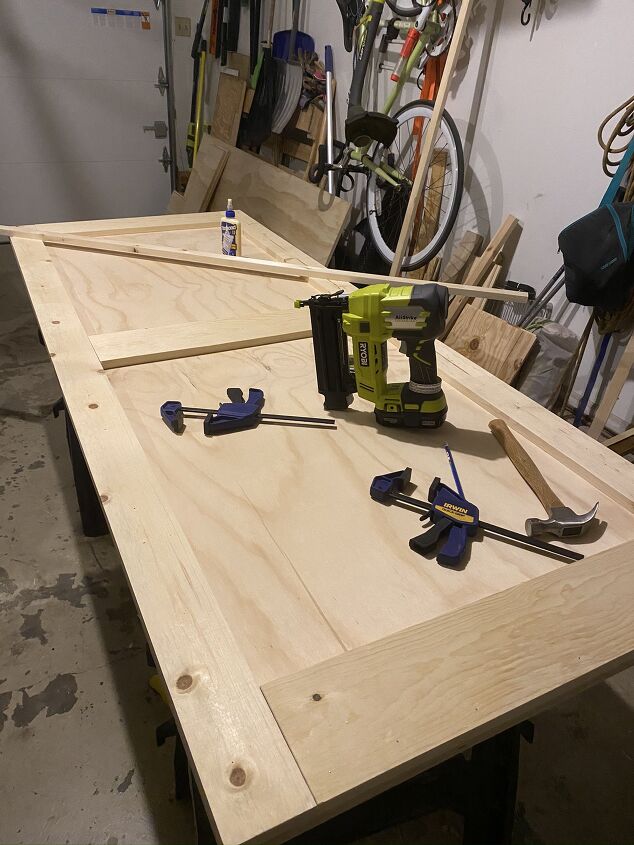
Cut the trim for your doors. I used 1×4 for the vertical side pieces and 1×6 for the top, bottom and middle pieces.
Cut 4, 1×4 were cut to 85″ and cut 6, 1×6 were cut to 22 3/4″
Now its time to make these doors!!
Use 1 1/4″ brad nails and wood glue to attach your longer 1×4″ boards first. I like to clamp these boards on and make sure the boards a flush with the ends and sides. You can use a brush to make sure you have enough glue on the boards.
Next, attach the 1×6 boards one at the top and bottom. with wood glue and brad nails. For the middle board measure the distance between the bottom of the top board and top of the bottom board to find your middle point. Draw a line on the 1×4 boards on where to match it up. Draw a line on the middle point of the 1×6 and then matchup the lines on the sides with this line. Glue and nail the board down.
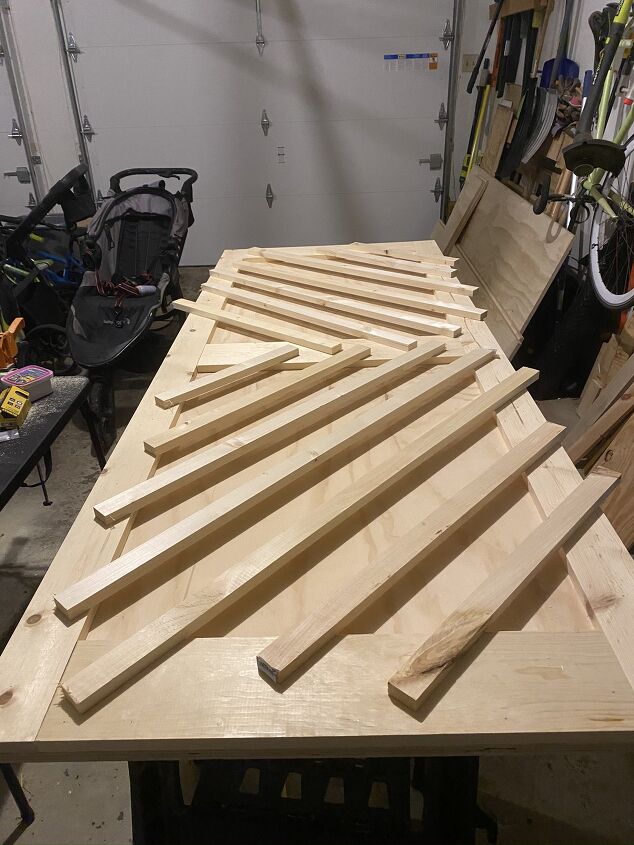
Now comes up the hardest part. I lined the boards out to a pattern that I wanted. I kept them spaced evenly apart. I found that using a 1×6 board helped with this. You need to really pay attention to the middle area so that the patterns mirror each other.
Use a speed square to find your angle, mark it with a pencil and then cut it with a miter saw. I often made one cut and cut the board down to a bit bigger than I needed and then lined it up and used the speed square to get the second angle.
After all of the boards were attached its time to fill nail holes with wood filler and then its time to sand your life away lol.
Next up you need to finish the doors. If you are going to stain the boards you would prestain, stain and seal.
I decided to paint the boards so I also caulked all of the steams and then primed the doors before painting. It took me two coats to get what I was wanting.
Let me know if you have any questions! And if you end up making a barn door I would love to see it!

COMMENTS