My two oldest kiddos were always fighting over the one small ottoman we had. So I went on the look out to purchase a couple poufs for them but they were so expensive. These poufs could range from $50-120 and wouldn’t be exactly what I wanted. During the pandemic I took up sewing again so I decided why not give it a try and make them myself! The boys were so excited about this whole process and they are their new favorite thing to sit on. Instead of spending $100-240 for two I made both of these for around $70 and they are exactly as I wanted!
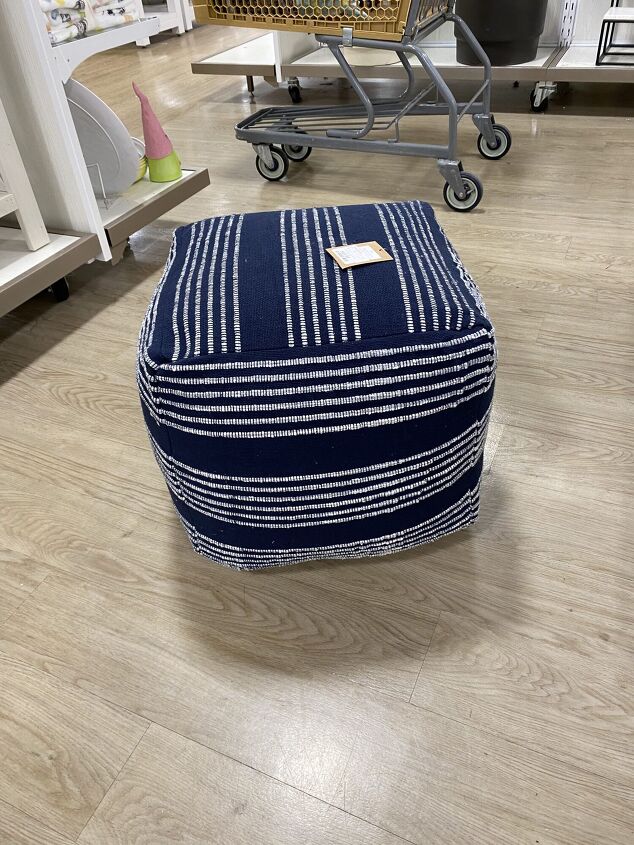
Here is an example of a pouf I saw at Homegoods and the one I was trying to replicate.
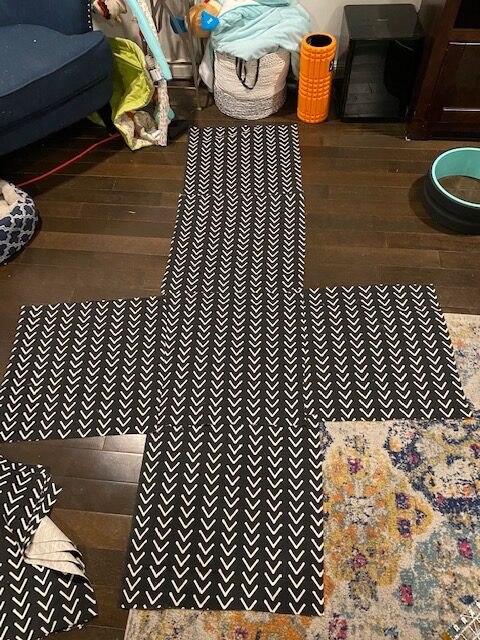
Here is the tutorial in case you want to make your own! Materials: 1.5 Yards of your choice of fabric for each pouf (I bought this mud cloth fabric from etsy due to the thickness of the fabric and the cool pattern!) Sewing Machine Thread Sewing needle 1.5 bags of 16oz Biggie bean bag fill per pouf 1/2 container of 96 oz weighted stuffing beads per pouf 5″ long 1 1/2″ wide Leather straps per pouf 2, 1/4″ Screw posts: per pouf Now let’s put it all together: Start by cutting the fabric into 20″ x 20″ squares, you will need 6 Sew all of the square pieces into a cross shape like this with right sides together making sure the patterns line up like you want. You can use pins to hold the squares together so you sew them straight
Now, sew the pieces into a cube with a 6 inch or so gap left on the last edge to be able to turn inside out and give you enough space to fill with bean bag filling. I started by pinning the long T area all together and then pinned and sewed one of the end pieces on the last three sides to complete that cube. I then sewed the other three sides of the last square leaving the 6 inch gap on one side. I decided to put on a decorative handle on the pouf as an extra touch! Next you 5″ strip of leather for each pouf. Drill holes in about 1″ from the sides in the middle of the width of the leather with a 3/16 drill bit. Make small hole with a seam ripper in the area you want to put the pouf where the drilled holes are located so you can use the screw post to attach the leather to the pouf. I picked the middle of one of the squares as my location. Now it is time to fill. This is definitely a two person job. Thankfully my husband was able to help me. I have seen people use old t-shirts, polyester batting etc, but I really like this large bean bag filling so that’s what I used. I also put half of the weighted beads in the bottom of each pouf so that they are a bit heavier and less likely to be thrown in my house like a grenade.
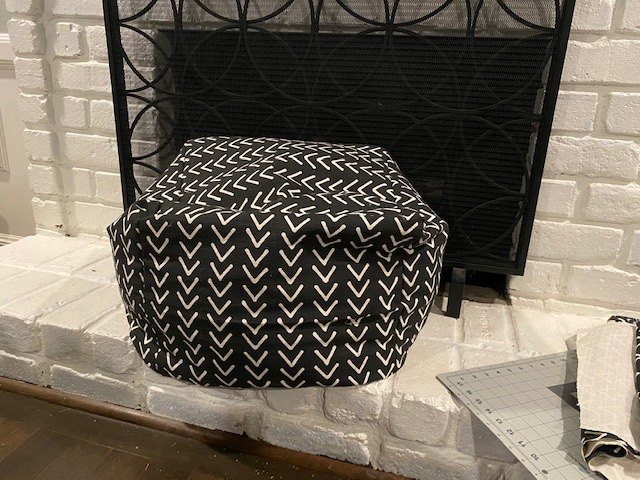
Make the pouf as firm as possible by compressing the beads and stuffing by hands. Last thing to do is hand sew the closure shut. I didn’t take a video or picture of this but you can do it like this.
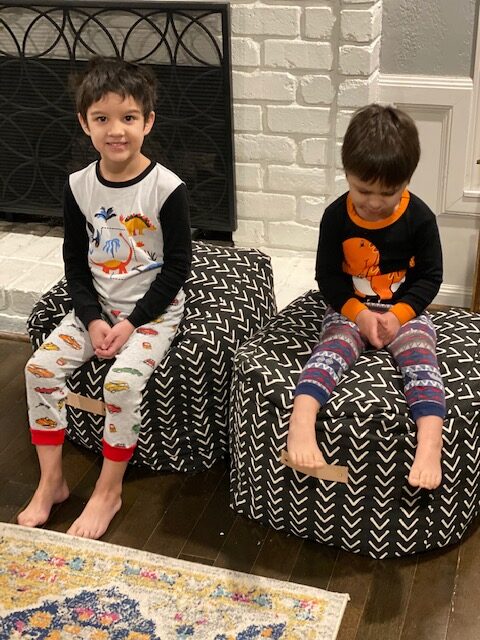
And ta da! You have a finished pouf that is beautiful and kid approved!!

COMMENTS