We are in the middle of updating our living room and were needing to hide an uncomfortable amount of toys. We have toy storage in other areas but the boys seems to bring their toys downstairs and they never go back where they belong. They love hanging out in our living room so I decided to update an IKEA Kallax to not only look beautiful but also be functional. This IKEA hack can be used for toys but can also be used as a sideboard, etc. Hope you enjoy this tutorial!
Materials:
1 IKEA Kallax 8 cube $79
8 IKEA Kallax doors $13 a piece
20 pieces of Wood moulding $ 5 a piece
Wood glue
Sand paper 120 grit
Furniture legs
Cabinet pulls
Shellac Primer
Paint
Now let’s put this Ikea hack together:
Start by putting together the IKEA Kallax cabinet per the instructions that come from IKEA
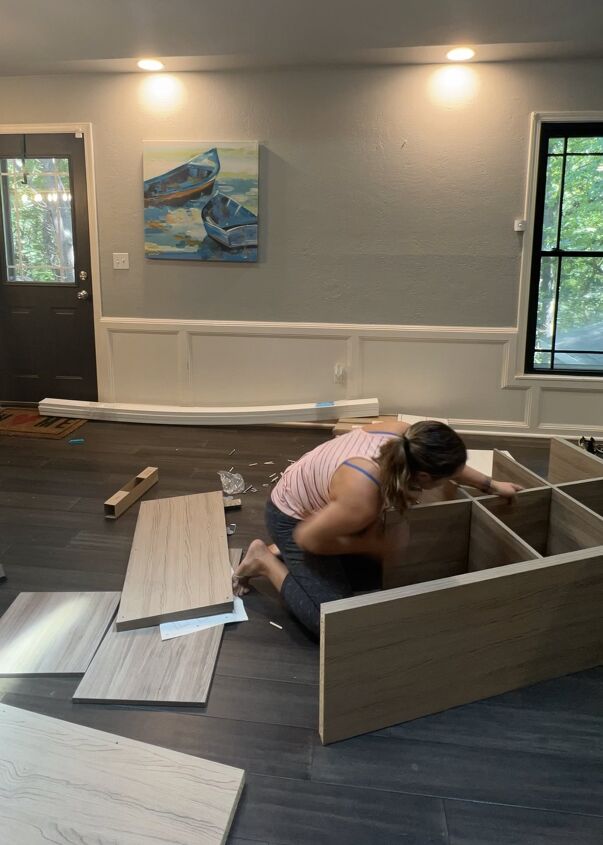
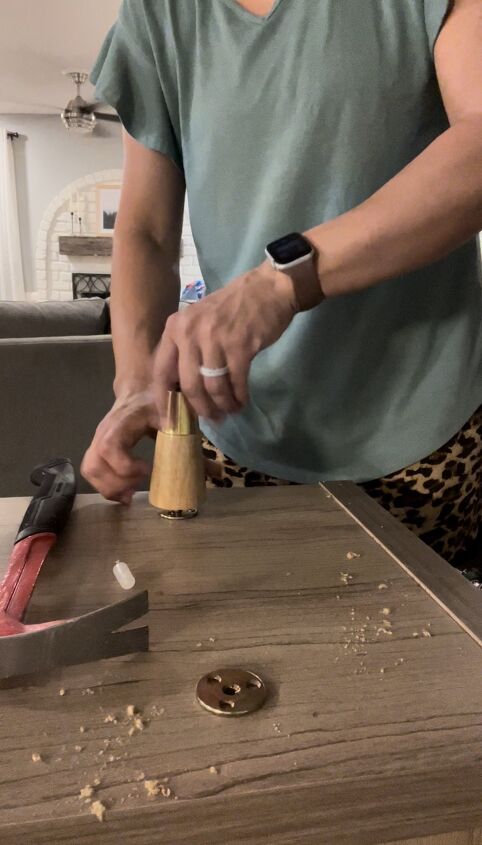
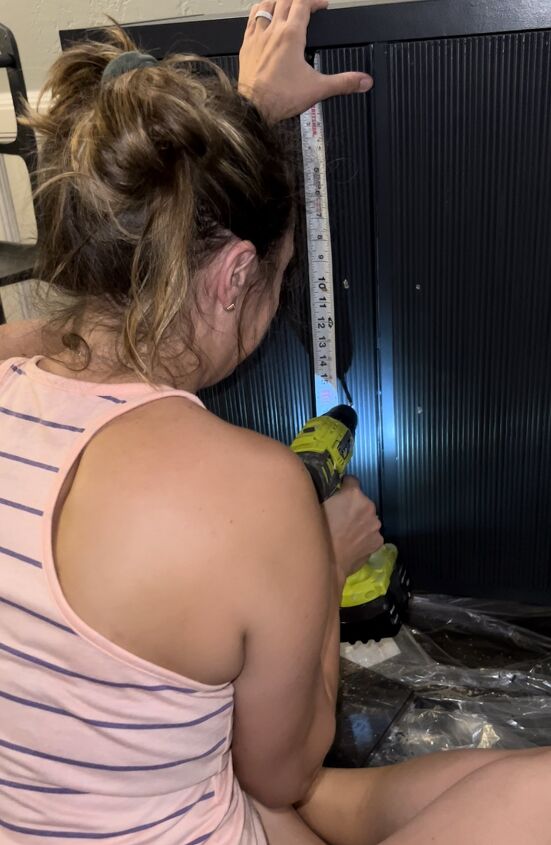
Attach the furniture legs to the Kallax cabinet. I installed the legs 5″ from the left and right sides and 2″ from the front and back.
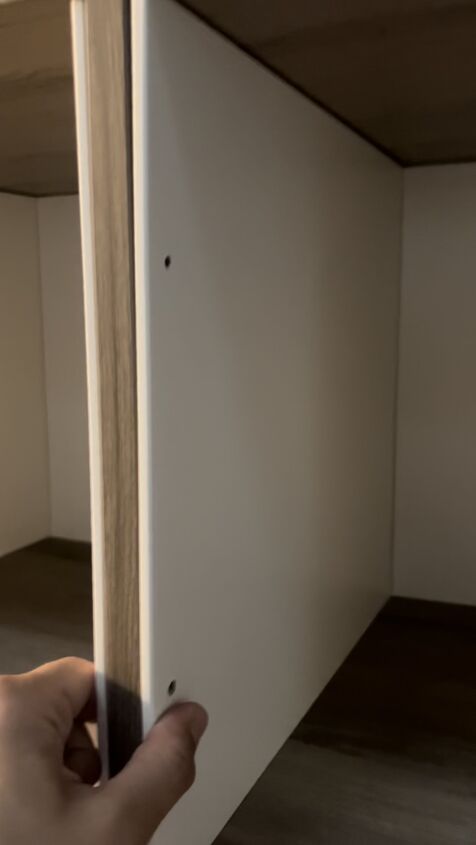
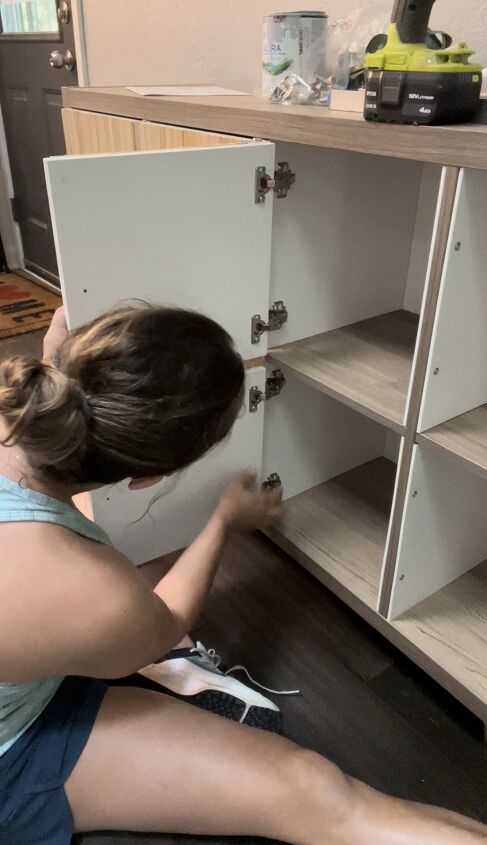
Install the inserts for the doors and drawers into the Kallax cubes but instead of using the measurement guide they had install the inserts flush with the frame.
Once that was done cut all of the wood pieces. I used my miter saw and a stop block to do this. This ensures that every piece of wood is exactly the same size. I cut 78 of the moulding pieces at 17″. Lightly sand the ends of each piece in case of splitting. One way to avoid splitting to occur is to put the good side down when using a miter saw and the good side up when using a table saw.
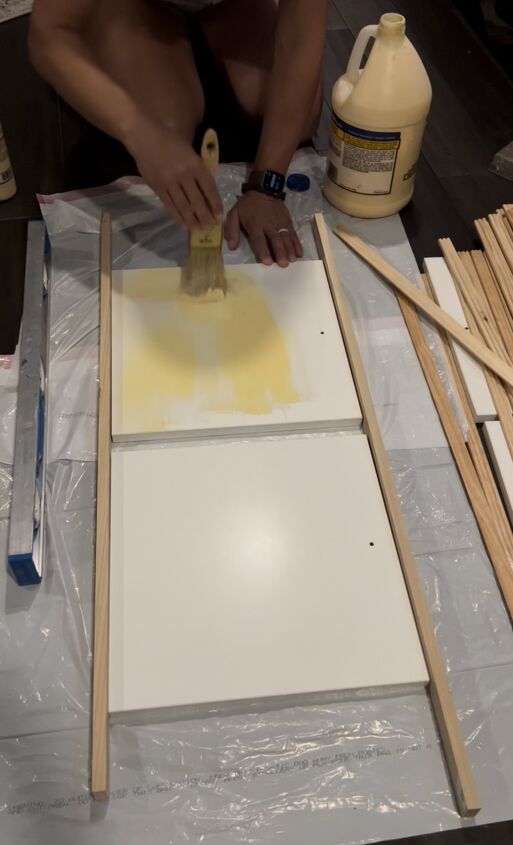
After these were cut use wood glue to attach the moulding to the doors and drawer fronts using wood glue. I wanted two doors to look like one so I lined this up so that the moulding started at the top of one of the doors and ended at the bottom of the other door. Put glue on the doors and drawer front with a brush, making sure it was not to thick for it to go between creases.
I fit 17 moulding pieces on each drawer or door but there was space for a partial piece of moulding. If you get any dripping or glue on the moulding you can wipe the glue off with a wet paper towel.
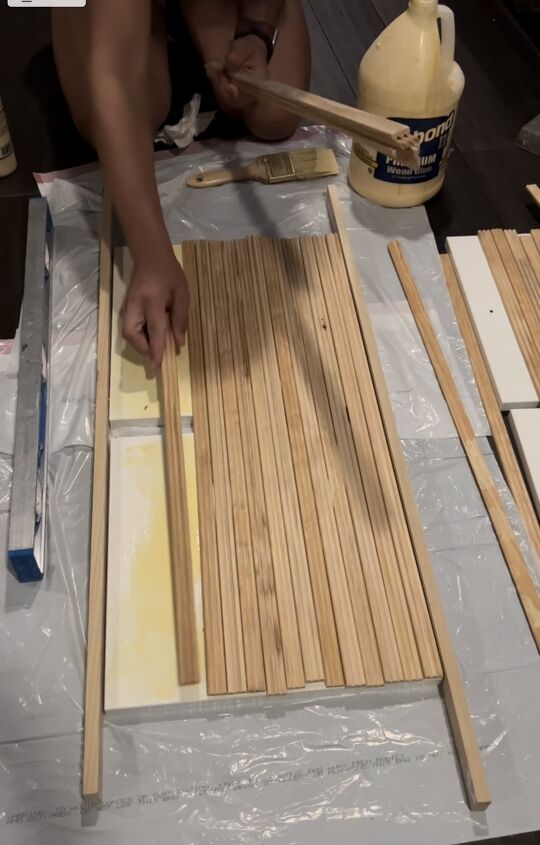
Make sure the moulding is flush all the way around. You can use a board a guide and push the pieces flush with the ends and sides of the door
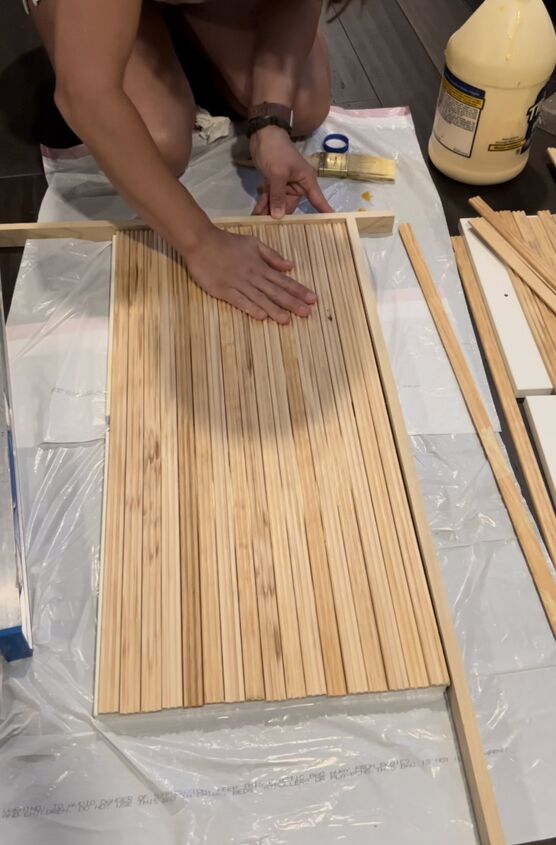
Use a table saw to cut down the partial piece after I measured how wide it needed to be. To get this measurement I held the moulding onto the door and drew a line down the back side where I needed to cut.
Glue this last piece of moulding on each drawer and door. I did this when they were upright and taped then in place
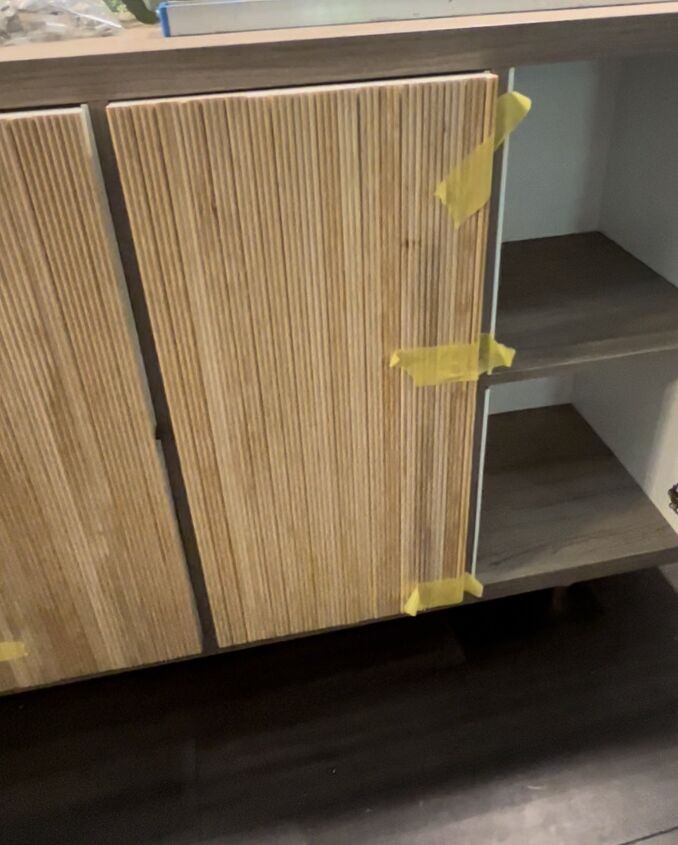
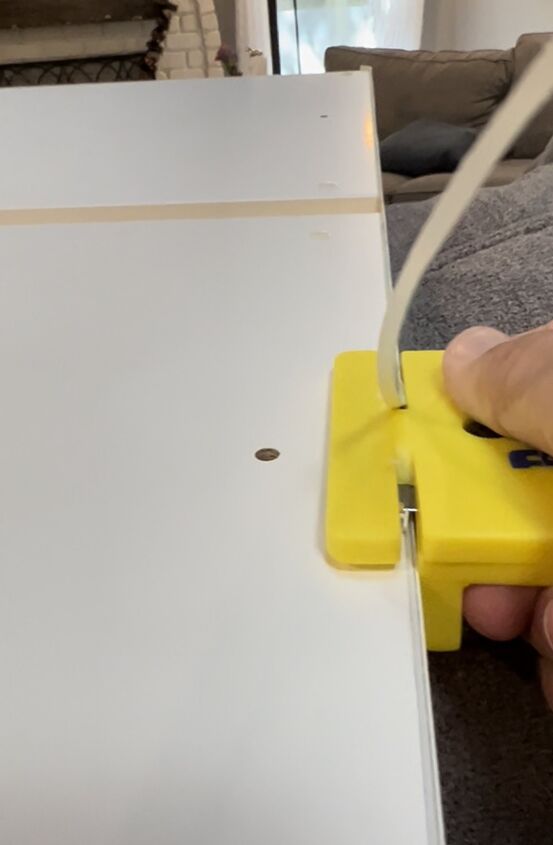
To make the doors look like one piece so I took the doors off and applied edge banding that was sticky not the iron on kind.
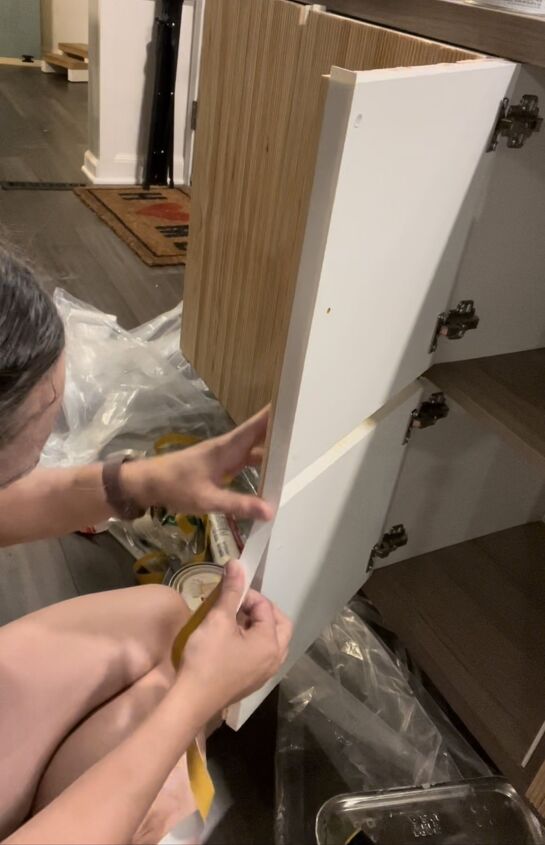
You can use an edge band trimmer to trim the banding flush with the doors.
When the glue dried prime the doors and kallax cube with Shellac Primer
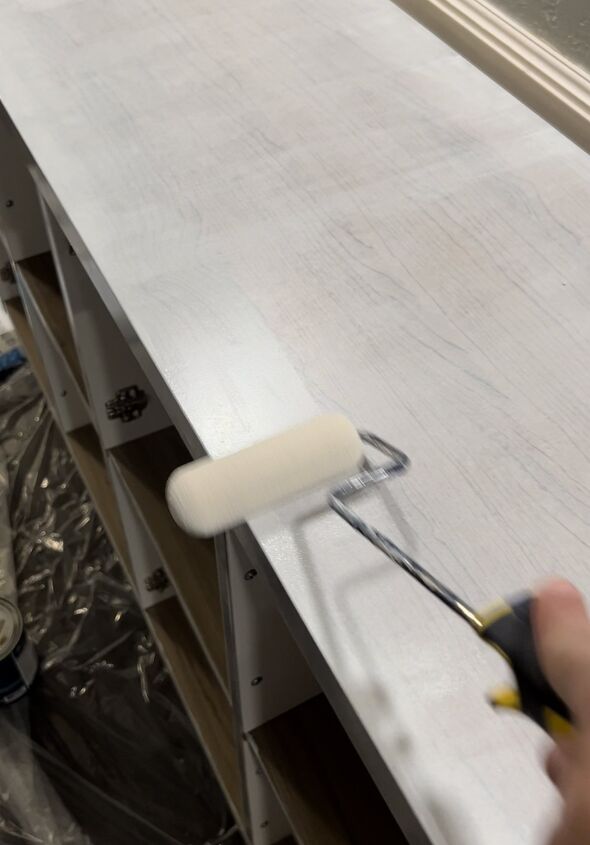
After it was dry paint the kallax and drawers with cabinet primer by Behr
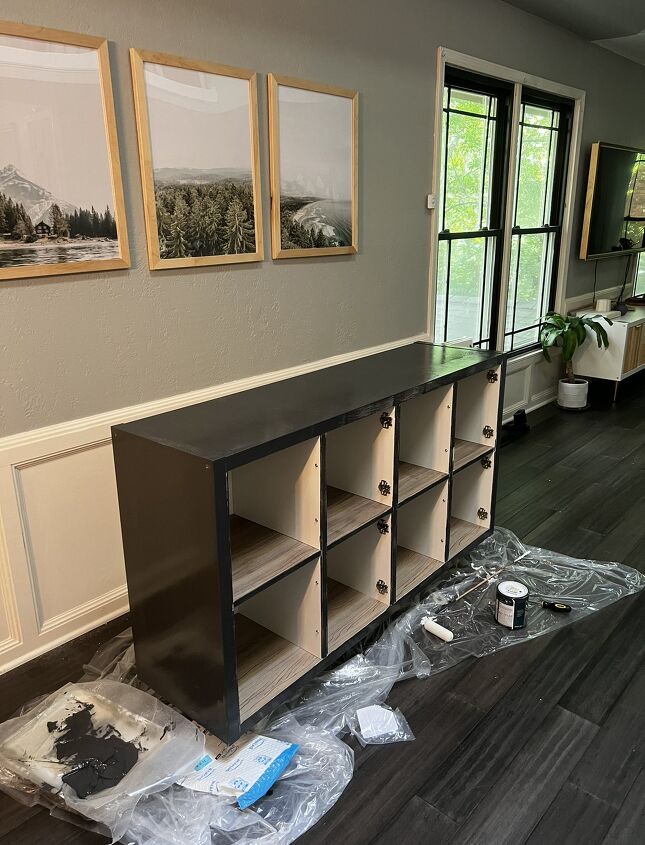
Next you can install the cabinet hinges and attached the doors to the Kallax cube
Now it is time to attach the door pulls!
The last thing to do is to make sure the kallax does not tip. We attached it to the wall so that the kids would not knock it over when they pulled their toys and craft kits out.
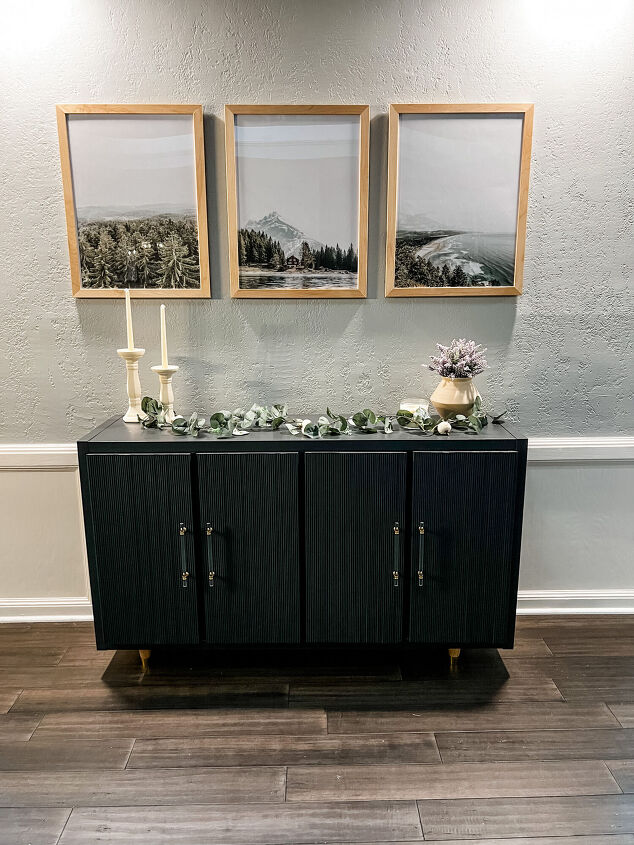
And there you have it! An amazing IKEA Kallax hack sideboard! It has so much storage and is so sleek! And it’s amazing how many toys it holds!!

COMMENTS